
Setting up a smart home for a parent sounds like a weekend project. It does not have to be. With the right devices and a clear plan, you can install the core safety and convenience features in a single afternoon visit. This guide gives you the exact sequence, so you spend less time troubleshooting and more time with your parent.
The system we are building has five components: a voice-controlled hub, automated lighting, a smart lock, a smart thermostat, and a presence sensor. Each one serves a specific aging-in-place purpose, and they all work together through a single voice interface.
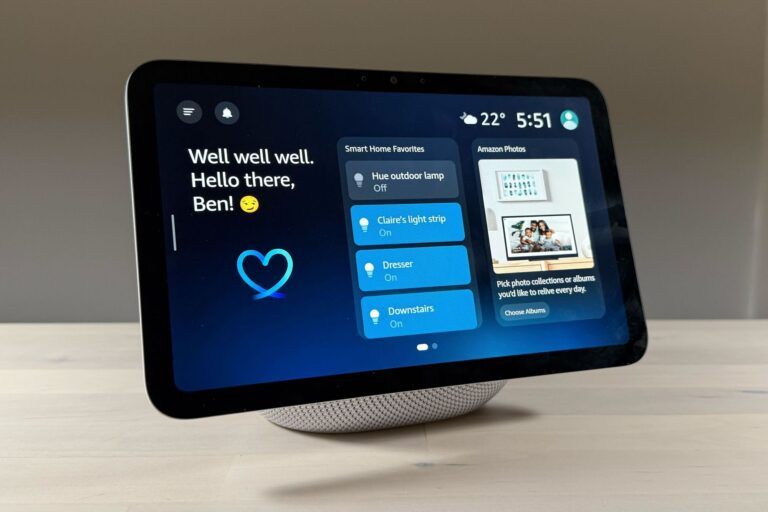
Amazon Echo Show 8 (3rd Gen)
Voice-controlled video calling, reminders, and smart home hub
Check Price on AmazonBefore You Visit: The Prep Checklist
Do these things before you drive over. They will save you significant time on-site.
Check the Wi-Fi
Everything in this guide requires a stable Wi-Fi connection. If your parent’s internet is slow, unreliable, or has dead zones in key rooms, fix that first. A modern mesh Wi-Fi system (like Amazon Eero or Google Nest WiFi) costs $150-250 and provides whole-home coverage. This is the foundation. Without good Wi-Fi, smart home devices become frustration machines.
Create or Access Their Amazon Account
The Echo Show requires an Amazon account. If your parent has one, get the login credentials before your visit. If not, create one using their email address. You will also need the password for their Wi-Fi network.
Order Everything in Advance
Have all five devices delivered and unboxed before your visit. Charge anything that needs charging. Read the quick-start guides. This turns your visit into pure installation rather than a mix of unboxing and setup.
Step 1: The Hub (Echo Show 8) – 10 Minutes

The Echo Show 8 is the command center. It gives your parent voice control over the entire smart home, video calling with family, visual reminders, and a screen that displays the time, weather, and photos when idle.
Why voice control matters for seniors: Voice is the most natural interface. Your parent does not need to find an app, navigate a menu, or remember which button to press. They just speak. “Alexa, turn on the kitchen light.” “Alexa, what is the temperature?” “Alexa, call Sarah.” For someone with arthritis, vision problems, or mild cognitive decline, this is transformative.
Setup:
- Plug it in on the kitchen counter or living room side table, wherever your parent spends the most time.
- Follow the on-screen setup: connect to Wi-Fi, sign into the Amazon account.
- Set the time zone and location for accurate weather.
- Enable “Show Mode” so it displays a clock and weather when idle, rather than ads.
- Set up your parent’s voice profile so Alexa recognizes them.
Key configurations:
- Turn on “Drop In” for your parent’s contacts. This allows you to video call them without them needing to answer. It is like walking into the room. Helpful for wellness checks.
- Set up “Reminders” for medication times, appointments, and daily routines.
- Upload family photos to Amazon Photos so the screen becomes a digital photo frame when idle.
Step 2: Motion-Activated Lighting – 15 Minutes
Nighttime falls are the number one risk we are solving for. Motion-activated lighting eliminates the dangerous fumbling for light switches in the dark.
Setup:
- Install the Hue Bridge by plugging it into your parent’s router with the included ethernet cable.
- Add the Hue Motion Sensors to the Hue app. You will need to scan the serial number on the back of each sensor.
- Mount the sensors using the included adhesive or screw mount. Place one in the bedroom doorway (aimed at the bed area), one in the hallway, and one at the bathroom entrance.
- If using Hue bulbs, screw them into existing light fixtures along the path. If using third-party smart bulbs, connect them through the Alexa app instead.
- Configure the daytime behavior (full brightness) and nighttime behavior (10-20% warm light, 2200K) in the Hue app.
Voice integration: Once the Hue Bridge is set up, link it to the Alexa app. Now your parent can also say “Alexa, turn off the bedroom light” or “Alexa, dim the hallway to 50%.” The motion automation and voice control work together.
Step 3: Smart Lock – 20 Minutes
A smart lock solves three critical problems for aging in place:
- Emergency access: If your parent falls, you can unlock the door remotely for paramedics. No more hiding keys under mats or breaking down doors.
- Caregiver access: Give home health aides, cleaning services, or family members their own access codes. See exactly when they arrived and left.
- No more lockouts: Your parent can use a simple code instead of a key. No more fumbling with keys in arthritic hands or getting locked out.
The Schlage Encode Plus has a physical keypad with tactile buttons. Your parent punches in four digits and the deadbolt opens. No smartphone needed. It also has a regular keyhole as backup.
Installation: The Schlage Encode replaces the existing deadbolt. You need a screwdriver and about 20 minutes. The hardest part is removing the old deadbolt. The new one fits into the same hole.
- Remove the existing deadbolt (interior and exterior sides).
- Install the Schlage Encode following the included guide. It uses the existing bolt hole.
- Insert the batteries (included) and test the keypad.
- Download the Schlage Home app and connect the lock to Wi-Fi.
- Create access codes: one for your parent (something they will remember, like the last four of their phone number), one for you, and one for any regular caregivers.
- Link to Alexa so your parent can check lock status by voice: “Alexa, is the front door locked?”
Set up auto-lock: Configure the lock to automatically engage 30 seconds after closing. This means your parent never needs to remember to lock up. The door just locks itself.
Step 4: Smart Thermostat – 15 Minutes
Temperature regulation matters more than most people realize for senior safety. Older adults are more susceptible to hypothermia and heat stroke. A house that drops to 60 degrees overnight or climbs above 85 in summer is a genuine health risk. Many seniors also lower the thermostat too aggressively to save money, putting themselves at risk without realizing it.
The Google Nest Thermostat lets you monitor and adjust your parent’s home temperature from anywhere. If the house gets dangerously cold or hot, you will know.
Installation:
- Turn off the HVAC system at the breaker.
- Remove the old thermostat faceplate and take a photo of the wiring before disconnecting anything.
- Connect the wires to the Nest base plate using the clearly labeled terminals.
- Mount the base plate and attach the Nest display.
- Turn the breaker back on and follow the on-screen setup.
- Connect to Wi-Fi and link to the Google Home app on your phone.
Key settings for aging in place:
- Set temperature limits (never below 68 in winter, never above 78 in summer) that cannot be overridden without your intervention.
- Enable “Home/Away” detection so the system maintains safe temperatures even if your parent forgets to adjust it.
- Turn on app notifications for extreme temperature events.
Voice control: “Hey Google, set the temperature to 72” works through any Google-connected speaker. If you are using Echo instead, the Nest also links to Alexa: “Alexa, set the thermostat to 72.”
Step 5: Presence Monitoring – 10 Minutes
This is the most advanced piece and the one that provides the deepest peace of mind for remote family members. The Aqara FP2 presence sensor uses radar to detect whether someone is in a room, even if they are sitting perfectly still.
Why this matters: You can set up automations that alert you to unusual patterns. If your parent typically gets out of bed by 8 AM but the bedroom sensor still shows presence at 10 AM, something might be wrong. If the bathroom sensor shows continuous presence for 45 minutes, it could indicate a fall or medical event.
Setup:
- Download the Aqara Home app and create an account.
- Mount the FP2 on the wall or ceiling using the included adhesive. For a bedroom or bathroom, ceiling mounting provides the best coverage.
- Add the device in the app by scanning the QR code.
- Define zones within the sensor’s field of view (bed area, doorway, bathroom entrance).
- Set up automations: notifications if a zone is occupied or unoccupied beyond expected times.
The FP2 works with Apple HomeKit, Alexa, and Google Home. It integrates into whatever ecosystem you have chosen for the rest of the setup.
After Setup: Teaching Your Parent
The technology is only useful if your parent actually uses it. Spend 30 minutes walking them through the basics.
Start with voice commands. Have them practice saying “Alexa, turn on the lights” and “Alexa, what time is it?” Success with simple commands builds confidence for more complex ones.
Write it down. Leave a card next to the Echo Show with five key commands: turn lights on/off, check weather, call [your name], set a reminder, ask the time. Laminate it if possible.
Do not teach everything at once. Introduce one new capability per visit. This week: voice-controlled lights. Next visit: video calling. The visit after that: reminders and timers. Gradual introduction prevents overwhelm.
Frequently Asked Questions
What if the internet goes out?
The Schlage lock still works via keypad code without internet. The Hue lights still respond to their wall switches. The Nest thermostat maintains its last schedule locally. The Echo Show and Aqara sensor will not function without Wi-Fi, but they are convenience and monitoring tools, not safety-critical systems. If your parent’s area has frequent outages, pair this setup with a non-internet medical alert like the Medical Guardian Mini.
My parent does not like being told what to do by a machine.
Frame it as convenience, not monitoring. “You will never have to get up to check if the door is locked” is different from “I will know if you leave the house.” Focus the conversation on what the technology does for them (hands-free lighting, no more key fumbling, comfortable temperatures) rather than what it reports to you.
Can I manage all of this remotely after setup?
Yes. Every device in this guide has a companion app that works from anywhere. You can adjust thermostat settings, create new lock codes, check motion sensor logs, and video call through the Echo Show from across the country. The initial physical setup is the only part that requires being on-site.
Is all of this compatible? It seems like a lot of different brands.
Alexa (the Echo Show) acts as the unifying layer. Hue lights, Schlage locks, Nest thermostats, and Aqara sensors all have Alexa integrations. Your parent interacts with one voice assistant that controls everything. They do not need to know or care that the light is Philips and the lock is Schlage.
What does this whole setup cost?
Approximate total for all five devices: $500-700. The Echo Show 8 is around $100-150, the Hue Motion Sensors run $35-40 each (you will want 2-3), the Schlage Encode is about $250-300, the Nest Thermostat is $130, and the Aqara FP2 is about $55-75. This is a one-time investment with no monthly fees (unless you add optional monitoring services).